Showing posts with label confidence. Show all posts

Wednesday, November 16, 2016

Girl Talk - Snarkfest


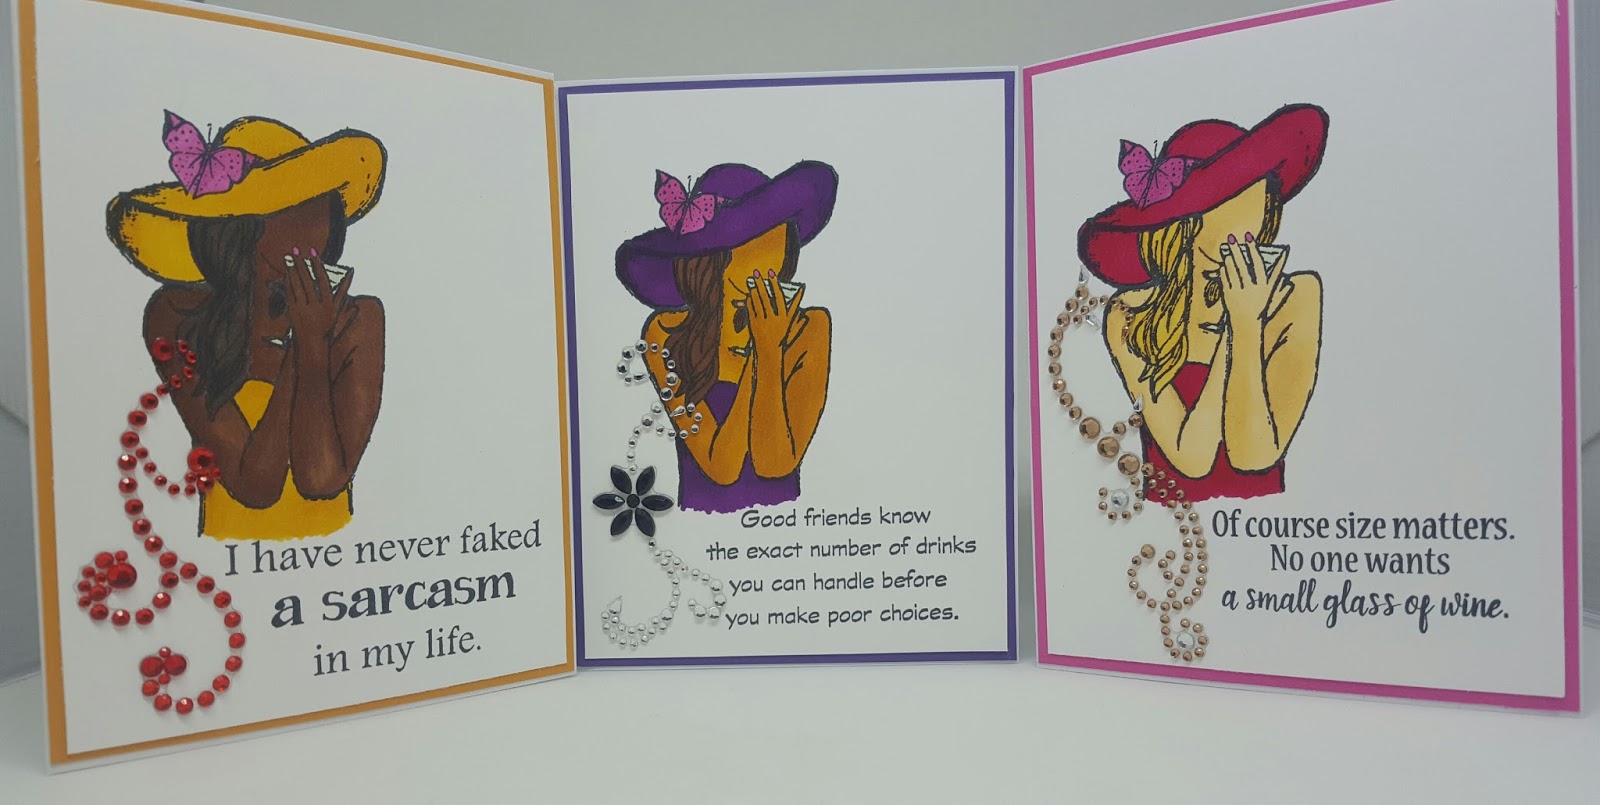
I love making coordinating card sets! Even if they're not always going to the same recipient, I think it's fun when papers, layouts, images, or sentiments align like the stars! Ha!

Today I have a witty set for you using the same image from Unity Stamp Co called Give Love - Laugh Lots. While this set comes with great sentiments I opted to pair the image with sentiments from So Suzy Stamps.

My first card features a So Suzy Stamp sentiment (say that three times fast) called Size Matters.
I stamped my image in Memento Tuxedo Black and colored it with Spectrum Noir Markers. The sentiment was stamped using Versa Fine Black Ink. I simply mounted my 3.75 x 5 card front onto a corresponding color solid card stock mat, then mounted to 110 lb card stuck cut at 4.25 x 5.5 (just cut an 8.5 x 11 piece of card stuck in half and fold in the middle). I couldn't leave well enough alone and adhered some bling by Recollections.

For my next card, I used a sentiment from So Suzy Stamps called Faked A Sarcasm. Using the same inks as my first card, I stamped the image and sentiment, colored with Spectrum Noir markers and adhered bling from Recollections. All measurements on the second card match the first.


While the inside of my first two cards contain blank matted card stock, I did have to include an inside sentiment on my last card. Following the same techniques used on the first two, this time I paired my image with a sentiment called Good Friends Know.
While I love the sentiment as a whole, I feel that the last part of it makes a great punch line for the inside of a card. So hold onto your seats, make sure you're sitting down......I cut the sentiment in half. Yes, I cut my stamp. It can always be put back together if I want the sentiment whole again, but I actually do this with a lot of my stamps to provide more flexibility. It makes it easier than having to ink up just part of a sentiment, stamp it, then hope you cleaned it well enough to now ink up the other part and stamp it somewhere else.


Doesn't this make for a fun card with the sentiment split up? Don't be shy ladies. Grab your scissors. Admittedly I've only ever cut red rubber stamps.
If you are going to cut them. don't worry about a clean cut, or trimming them down after you cut them. Keeping them a bit imperfect at your cut line and not trimming them further makes them easier to piece together if you wish to put them back again. The pieces will fit just like a puzzle.

I think this makes a great coordinating set. I plan to list it in my Etsy shop as a three piece offering and think the coordination adds to the appeal. Let me know what you think!


Wednesday, March 16, 2016

So Suzy Stamps Guest Designer - Elegance

Hello Everyone! While you’re reading this, I’m freezing my tush off in Minnesota! I hope you’re all keeping warm!

This week I’ll be sharing three cards I made using the dress form stamps as well as some glitter embossing powder, PearlEx, and lotsa bling! I hope you like them!


For my first card, I used the Dress Form Set. I stamped it in light grey, twice across the card front, trimming the edges so I wouldn’t have a half dress form hanging off the edge of my card. I then stamped the Elegance sentiment in black Versa-fine ink. I adhered a strip of grey and white polka dot ribbon around my white card front. I mounted my card front onto grey card textured card stock, then onto a black and white damask print patterned paper and onto a white card base. I tied a bow with another piece of the polka dot ribbon and adhered it to the front, then attached three rows of pearls. Quick and simple with a lot of elegance, just like the stamp says!

For my next card, I used each of the dress form stamps and aligned them using my MISTI then individually stamped them in a rainbow of colors using Distress Ink.


I then used Versa-Mark to stamp the BE sentiment and heat embossed it using glitter embossing powder. I used the stitched rectangles die to give some texture to my boarder then inked the edges. I mounted it on purple shimmering card stock then inked those edges as well. Then I mounted it to a white card base. Just look at the shine!


For my final card of the week, I broke out my PearlEx. These are the same as Perfect Pearls, but come in a larger variety of colors for a cheaper price. For this card, I used Dress Form 2 – Simple Swirl and the Confidence is Sexy sentiment stamp.


I ran a piece of black card stock through my embossing machine, again using the stitched rectangle die cut. I stamped my image and sentiment in Versa-Mark and layered on various colors of PearlEx using a standard paint brush. I then misted a little water over the surface to set to PearlEx. I mounted the card front onto my purple shimmery card stock then onto a white card base. I adhered a few gems to help fill the space above the sentiment. I always struggle with my bling placement, but try to stick to the rule of using an odd number based on a blog post I read forever ago about how the brain reacts to odd or even numbers of things. What is your rule for bling? Share it in the comments!